
Terminal & Remote Access
Add and Remove SSH Keys
By TermSquad · Last reviewed
Add SSH keys under Settings → SSH access. Each key belongs to a specific computer and Linux user, so an agent key does not automatically give admin access.
Prepare your public key
Use the public part of an existing SSH key pair on your own device. It normally has a .pub filename and begins with a type such as ssh-ed25519.
If you need a new pair, run this on your own device:
ssh-keygen -t ed25519 -f ~/.ssh/termsquad_ed25519 -C "TermSquad laptop"Choose a passphrase when prompted. If that filename already exists, choose another name rather than overwriting an existing key. Keep the private file on your device; copy only termsquad_ed25519.pub into TermSquad.
Add the key
- Select the intended computer.
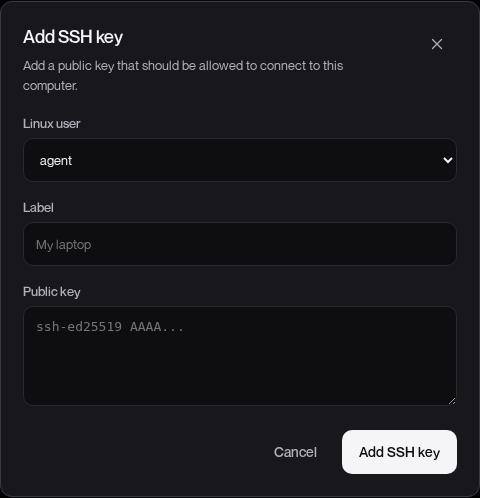
- Open Settings → SSH access → Add SSH key.
- Choose Linux user: usually agent.
- Enter a descriptive Label, such as “Work laptop”.
- Paste the complete line into Public key.
- Select Add SSH key and wait for the key to appear.
- Test a new SSH connection using the matching private key.
Remove an old key
Find the key in SSH access and use its removal control. Test your replacement key before removing your only working key.
Removing a key blocks future authentication with that stored key. It does not rotate passwords or reliably terminate an already open SSH session. If a credential is compromised, review other access methods too.